How to Revive a Dying Plant: Rescue Guide for Beginners
Watching a plant decline can be frustrating, but most plants can recover if you act fast and identify the problem correctly. Whether it’s caused by overwatering, poor lighting, pests, or neglect, understanding how to diagnose and revive a plant is essential for every plant lover.
Step 1: Diagnose the Problem
Plants show clear warning signs when they are struggling. Identifying these symptoms helps you apply the correct solution.
Yellow Leaves – Overwatering or nutrient deficiency.
Brown Leaf Tips – Low humidity, underwatering, or excess fertilizer.
Drooping or Wilting – Root damage, underwatering, or sudden environmental changes.
Moldy Soil – Poor drainage, overwatering, or fungal infection.
Stunted Growth – Lack of nutrients, poor light, or compacted roots.
Carefully inspect the plant’s leaves, stems, soil, and roots to find the root cause before making changes.
Step 2: Adjust Watering Immediately
Overwatering suffocates roots, while underwatering deprives plants of moisture. Use the finger test—insert your finger into the soil up to the second knuckle.
Dry soil – Water deeply, allowing moisture to reach the root zone.
Wet or soggy soil – Stop watering and allow the soil to dry before the next watering.
Moldy surface – Remove the top inch of soil and replace it with fresh, dry potting mix.
Use pots with drainage holes to prevent water buildup, and never let plants sit in standing water.
Step 3: Improve Light Exposure
Plants need the right balance of light to thrive. Too much sun scorches leaves, while too little weakens stems and reduces photosynthesis.
Bright direct light – Best for succulents, cacti, and herbs.
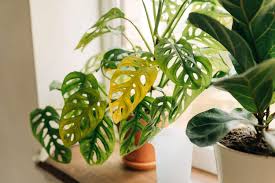
Bright indirect light – Ideal for most houseplants like Monsteras, Pothos, and Peace Lilies.
Low light – Tolerated by Snake Plants, ZZ Plants, and Cast Iron Plants.
Move the plant to its ideal light zone, and rotate the pot weekly to promote even growth. If natural light is limited, use full-spectrum grow lights.
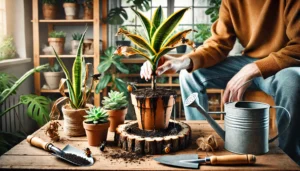
Step 4: Refresh the Soil and Check the Roots
Compacted, depleted soil can choke roots and starve plants. Carefully remove the plant from its pot and examine the root system.
Healthy roots – White or light brown, firm, and evenly spread.
Rotten roots – Dark, mushy, and foul-smelling.
Trim rotten roots with sterilized scissors, then repot the plant in fresh, well-draining soil. Choose a pot 1-2 inches larger if the plant has outgrown its container.
For houseplants, use light potting mix with added perlite. For succulents, mix in sand or cactus soil for better drainage.
Step 5: Feed Gently to Restore Nutrients
Revived plants need a gentle dose of balanced fertilizer to support new growth. Use a diluted liquid fertilizer with a balanced NPK ratio, applied every 4-6 weeks.
Organic options like compost tea, banana peel water, or worm castings are gentle alternatives for weakened plants. Avoid strong fertilizers, which can burn roots in fragile plants.
Step 6: Increase Humidity if Needed
Tropical plants like ferns, calatheas, and orchids need higher humidity to thrive. Dry air causes leaf tips to turn brown and crispy.
Group plants together to create a humidity zone.
Use a pebble tray filled with water beneath the plant.
Mist leaves lightly or use a room humidifier.
Avoid misting fuzzy-leafed plants like African Violets, as moisture can cause fungal problems.
Step 7: Treat Pests if Present
Pests like aphids, spider mites, and mealybugs weaken plants by sucking nutrients from leaves and stems. Look for sticky residue, tiny holes, or webbing.
Wipe leaves with a damp cloth.
Spray with diluted neem oil or insecticidal soap.
Isolate infested plants to protect others.
Repeat treatments every few days until pests disappear completely.
Step 8: Prune Dead or Damaged Parts
Dead leaves and stems drain energy from your plant. Use clean, sharp scissors to remove yellow, brown, or mushy growth. This encourages the plant to focus energy on new, healthy leaves.
For vining plants, cut back overly long, leggy stems to promote fuller growth. Always sterilize tools before and after pruning to prevent disease spread.
Step 9: Give the Plant Time to Recover
Plants need patience to recover fully. Avoid overhandling, excessive watering, or frequent relocation while the plant regains strength.
Monitor leaves for new growth—this is a sign your plant is responding well to the care changes. Depending on the plant type and severity of damage, recovery may take a few weeks to several months.
Step 10: Create a Consistent Care Routine
Once revived, your plant needs consistent care to stay healthy long-term.
Create a watering schedule based on plant type and season.
Place plants in correct light conditions and rotate for even growth.
Feed regularly with gentle organic fertilizers.
Check for pests and diseases during regular care.
Dust leaves monthly to boost photosynthesis.
Healthy plants thrive when they receive consistent, thoughtful care, tailored to their species’ needs.
Final Thoughts: Bring Dying Plants Back to Life with Proper Care
Reviving a struggling plant requires patience, observation, and a few simple adjustments. Whether it’s watering corrections, soil refresh, improved lighting, or pest treatment, most plants bounce back with the right care plan.
Quick Recap
✔ Diagnose the problem—look for symptoms like yellow leaves, drooping, or mold.
✔ Adjust watering to prevent root rot or drought stress.
✔ Move plants to the ideal light level for their species.
✔ Refresh soil and trim rotten roots if necessary.
✔ Feed gently with diluted fertilizer to restore nutrients.
✔ Increase humidity for tropical plants.
✔ Treat pests early with natural solutions like neem oil.
✔ Prune dead growth to redirect energy to healthy parts.
✔ Stay consistent with care after recovery.
With these plant rescue techniques, even the saddest plant can recover and thrive again. 🌿✨